2026 Chrome Compression Angle Stop Valve Guide
Nearly 30% of household plumbing callouts start at a failed shutoff. This highlights the importance of the right water control valve. It is every bit as important as the fixture it supplies.
This guide provides a practical overview of the 1/2 angle stop. It explains what it is, its role in modern plumbing, and the benefits of proper installation. Homeowners and professionals will find useful advice for various applications, from lavatory shutoffs to dishwasher and washing machine hookups.
We draw on trade references and product examples, including chrome-plated brass valves with integrated seals. That information helps you understand how these valves match common stub-outs and supply lines. Whether you’re doing a DIY fix or purchasing from distributors like Installation Parts Supply, knowing how the compression angle stop works is crucial. That understanding helps you select the most suitable water control valve for your job.
Understanding Angle Stop Valves and Compression Fittings
An angle stop is a compact shutoff valve that shifts flow direction by 90 degrees from the supply stub-out to the fixture supply line. You’ll usually find a 1/2 angle stop valve under sinks or behind toilets. It provides a local shutoff so you don’t need to shut down the entire house water. Both homeowners and pros rely on these valves for routine maintenance, fixture changes, and quick isolation during diy plumbing repair.
What an angle stop does:
- Offers a local shutoff point at lavatories, sinks, toilets, dishwashers, and washing machines.
- Fits into tight spaces where a straight valve would not be practical.
- Comes in common sizes, including angle valve 1/2 and smaller 1/4 variants.
How Compression Fittings Form A Seal
Compression-style valves use a nut and ferrule that compress onto copper, brass, or PEX (with an insert) to create a mechanical seal. The compression fitting angle valve goes in without soldering, speeding installation and simplifying future valve replacement. Installers tighten the nut to drive the ferrule against the stub-out so it grips and seals the tubing.
Reasons Pros And DIYers Prefer Compression
- No open flame or hot work makes compression friendly for retrofit jobs and tight access areas.
- Valves such as the 1/2″ angle stop can often be swapped without cutting back the supply line if the existing ferrule and nut are in good shape.
- Compression performs well on copper and PEX when used with the correct inserts or ferrules.
Compression Versus Sweat And Threaded Connections
Compression avoids the need for soldering, making many field repairs quicker. Sweat joints create a permanent connection that some plumbers favor for long-term work. Threaded setups, such as threading an angle stop into an FIP drop-ear 90, offer serviceability but require careful alignment and sealing. Debates on forums often center on buried threaded nipples versus sweat adapters and cosmetic concerns when exposed copper is visible under sinks.
| Connection Type | Pros | Cons |
|---|---|---|
| Compression (1/2 angle stop valve) | Quick install, no solder, easy valve replacement, compatible with copper and PEX | Ferrule may need to be replaced after repeated disassembly; sometimes viewed as less permanent than sweat joints |
| Sweat | Durable, permanent joint, preferred for long-term installs | Requires soldering, hot work, longer downtime during installation |
| Threaded into FIP drop-ear 90 | Serviceable mechanical connection, secure joint, suitable for repeated maintenance | Requires careful sealing, buried nipples can be problematic, sometimes bulky in confined areas |
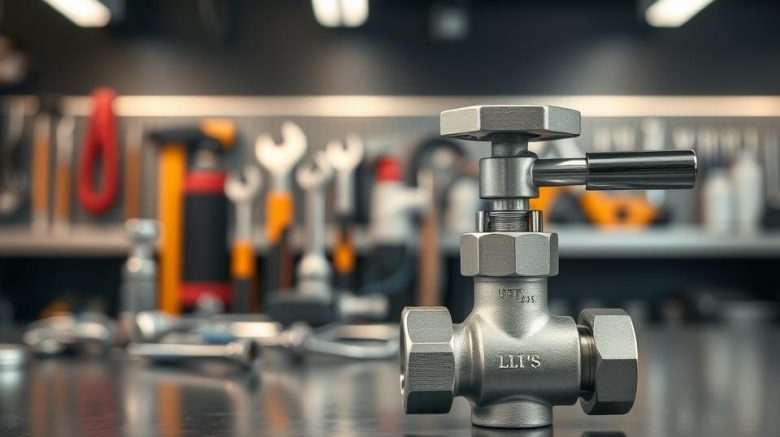
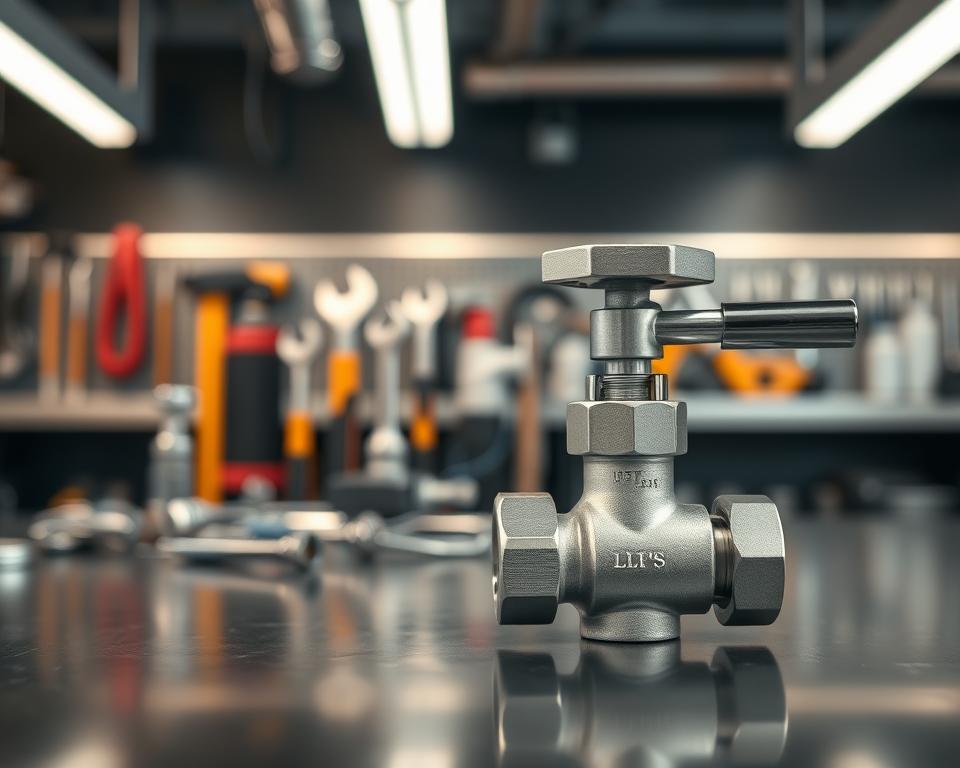
About The Chrome Compression Angle Stop Valve
The chrome compression angle stop valve balances style and functionality for exposed plumbing fixtures. With chrome-plated brass construction, it’s engineered to suit the needs of both buyers and installers. That makes it a popular option for visible supply shutoffs and quick repair work.
Overview of chrome-plated brass construction and finishes
High-quality angle stops feature machined brass bodies with a chrome-plated finish. The chrome finish coordinates with bathroom hardware and delivers a polished, tarnish-resistant look. Brass is selected as the base metal for its strength and suitability for potable water use.
Brands such as Schell and Moen supply chrome-plated brass options. Variants with integrated seals are also available from these brands. Listings usually indicate the finish, dimensions, and if the valve includes serviceable packing or a factory-installed compression nut.
Performance Highlights: Corrosion Resistance And Durability
Brass is valued for its corrosion resistance and for resisting dezincification in common domestic water environments. A chrome finish provides an additional layer of protection. This finish keeps the valve in visual harmony with faucets and nearby bathroom hardware.
With integrated seals, extra sealant is not usually required during installation. The quality internals and serviceable packing ensure a long cycle life. They deliver reliable shutoff over many open-and-close cycles.
Common Bathroom And Kitchen Locations For Chrome Angle Stops
You’ll often find chrome compression angle stop valves under lavatories, behind toilets, and under kitchen sinks. The 90-degree turn and compact form make them ideal where space is limited. They also excel at forming right-angle connections.
Common choices include the 1/2 compression angle stop or a 1/2 x 1/4 variant, based on fixture inlet size. Product pages often show chrome finish photos, information about integrated seals, and price points. That detail helps buyers understand what to expect in bathroom hardware and plumbing fixtures.
Standard sizes and connection types for angle valves
When you select an angle valve, understanding the size labels is critical. Manufacturers specify inlet and outlet sizes as nominal pairs, such as 1/2 x 1/4 angle stop or 1/2 x 1/2 angle stop valve. These labels indicate compatibility with various fixtures and supply lines.
The term 1/2 angle stop typically denotes a 1/2″ inlet, designed to connect to wall stub-outs. This size can accommodate a smaller outlet, like a 1/4 angle stop, for precise fixture connections. A 1/4 angle stop is often used for smaller flex lines or appliance inlets.
In some cases, a 1/2 x 1/4 angle stop is chosen when the supply line is full-size copper or PEX, but the fixture requires a smaller connector. For setups where supply and outlet share the same diameter, a 1/2 x 1/2 angle stop valve is preferred. Always verify the inlet x outlet sizing before making a purchase.
Compression-specific valves are popular because of how easy they are to connect in the field. A 1/2 compression valve fits standard 1/2″ copper or PEX lines with the correct ferrule or insert. Many suppliers sell a 1/2 compression angle stop that includes a compression nut and ferrule for immediate installation.
It’s important to note that some valves are labeled in metric, like DN 15 for a 1/2″ nominal size. Verify that the valve aligns with the real-world supply piping and flexible hose fittings onsite. Confirm whether the product includes an integrated seal or if a separate ferrule is required to avoid installation issues.
How To Choose The Right Valve: Compatibility And Measurements
Choosing the right valve begins with precise measurements and ensuring the inlet type matches the stub-out. Measure the copper stub-out to identify its outside diameter. Check for threads and confirm whether the outlet is a drop-ear 90 or simply a plain copper stub. This quick check can help prevent costly returns and save time during installation.
How to measure stub-outs and determine angle valve 1/2 compatibility
Measure copper stub-outs based on their outside diameter. A nominal 1/2″ copper stub-out will be approximately 1/2″ OD. If you see threads, determine whether they are FIP or MIP. For compression connections, ensure the ferrule seating area and stub length allow proper engagement with the ferrule and nut.
Many pros favor drop-eared 90s or soldered adapters for better support and more consistent ferrule seating. Align these details with the valve inlet designation so the angle valve 1/2 fits correctly without improvised adapters.
Identifying A 1/2 x 1/2 Compression Shut Off Valve Versus Other Types
Look closely at packaging and spec sheets. With a 1/2 x 1/2 compression shut off valve, both inlet and outlet are listed as 1/2″ connections. In contrast, a 1/2 x 1/4 angle stop has a smaller outlet that suits fixture tubing or a flexible connector.
When replacing valves for a retrofit, compare the outlet size to the fixture supply hose. Confirm the valve body type is appropriate for the specific installation. Many installers maintain chrome compression angle stop valves for visible spots and standard brass versions for concealed shutoffs.
Checking for integrated seals and factory-fit compression nuts
Check the product details to see whether ferrules, nuts, or integrated seals are supplied. Certain models, like those from Schell, come with factory-fit compression nuts or self-sealing elements. Such features simplify installation and limit the need for Teflon tape.
Many compression-specific valves clearly indicate if ferrules are preinstalled or if a factory-fit nut is included. For fast, leak-resistant installs—particularly in tight bathroom or kitchen retrofits—opt for valves that include documented integrated seals.
Best Practices For Installing Leak-Resistant Angle Stop Valves
Begin by meticulously preparing the supply line. Use a quality tube cutter to make a square cut in copper or PEX. Ensure the end is deburred and squared for even ferrule seating. Slide the compression nut and ferrule onto the pipe correctly before attaching the valve. Clean the threads on drop-eared 90s or FIP adapters and confirm their depth to help prevent cross-threading.
To seat a compression fitting angle valve, gently press the ferrule against the valve inlet as you tighten the nut. Hold the valve body steady and tighten in small increments. Doing so helps the ferrule compress evenly. Follow the manufacturer’s torque guidelines, usually hand-tight plus a quarter to half turn with an adjustable wrench.
During installation of a chrome valve, always protect the finish. Chrome surfaces mark and scratch readily. Use strap-jaw pliers or wrap jaws with a soft cloth to prevent damage while tightening. Tighten gradually and then test the joint. Over-tightening may deform the ferrule or strip threads, which can result in leaks.
Compression joints usually don’t require Teflon tape. Apply thread sealant or Teflon tape only on threaded adapters and follow the manufacturer’s instructions. Valves featuring integrated seals or self-sealing designs may not require tape or sealant at the valve-to-connector interface.
For a leak-resistant angle stop valve installation, test under normal system pressure. Inspect the compression nut and ferrule for leaks. Should a minor leak show up, tighten slightly and recheck. If leaks continue, disassemble, inspect, replace damaged ferrules, and reinstall.
Many professionals prefer sweat or threaded connections for permanent installations. Trade practices sometimes use drop-eared 90s for easy valve swapping without cutting the stub-out. Choose the method that best suits the fixture access and long-term serviceability.
Tools And Materials For DIY Plumbing Repair With Chrome Valves
Having the correct tools and parts is essential for a successful DIY plumbing repair. Ensure your workspace is clear, confirm the valve model, and gather all necessary items before shutting off the water.
Essential tools
An adjustable wrench plus a backup wrench are vital to hold fittings while you turn the valve. A good tube cutter is important for clean cuts on copper tubing, minimizing leak potential. After cutting, use a deburring tool or reamer to smooth the tubing edges. Use a protective cloth or strap-jaw pliers to safeguard the chrome finish during tightening. Although flaring tools are less common for compression setups, they remain useful for flare fittings.
Suggested Consumable Parts
Always use new ferrules and fresh compression nuts when replacing an angle stop. Keep washers, O-rings, and integrated seals ready for models that require them. Choose manufacturer-specific ferrules for the best fit and seal performance.
Safety Procedures And Shutoff Steps
Before loosening any connection, confirm the correct branch shutoff or main water shutoff. Open the fixture and the valve to drain any remaining water from the line. If working near an electric water heater or disposal, shut off power to the nearby appliance. Wear eye protection and check for residual pressure before removing fittings.
Sourcing Valves And Parts
Wholesale distributors like Installation Parts Supply offer bulk compression nuts, new ferrules, and chrome valves. They cater to contractors and homeowners doing multiple installs. Ordering the correct sizes and brands upfront minimizes callbacks and keeps projects on track.
Common installation issues and troubleshooting
Small leaks and stubborn fittings are common issues during valve installations. This section walks through practical checks for diagnosing leaks. It also covers how to handle wall-mounted stub-out dilemmas and steps to avoid problems with a buried nipple inside a finished wall.
Diagnosing Leaks
Start by isolating the source: inlet, outlet, or packing. A drip at the compression nut usually points to ferrule seating, under- or over-tightening, or a damaged ferrule.
If the nut shows a hairline weep, loosen it, pull the valve off, inspect the ferrule and pipe end, then reseat or replace the ferrule and nut. Cut away any burrs or deformation on the tube before reassembling.
Valves that use integrated seals must be checked visually. If the seal is torn or displaced, replace the valve. When diagnosing leaks, note the exact leak location to avoid repeated disassembly.
Concerns With Wall-Mounted Stub-Outs
Plumbers often debate using threaded elbows versus sweat fittings at rough-in. Using a threaded elbow means valves can be threaded on and swapped without trimming the stub-out. This approach supports a leak-resistant angle stop valve strategy where service access is important.
Sweat fittings result in a durable, permanent joint. They reduce the likelihood of seepage at the joint, though soldered connections make future valve swaps more difficult. Opt for sweat fittings when long-term permanence and low maintenance are key goals.
When buried nipples cause problems
A buried nipple may seize or corrode inside the wall, leaving you with a stuck valve and messy repairs. Professional references, including work by Peter Hemp, stress careful rough-in planning to avoid this situation.
The best approach is using drop-eared 90s, an exposed threaded elbow, or a sweat adapter at rough-in to keep the threaded nipple from being buried. This level of planning cuts down on situations where walls must be opened for valve replacement.
Practical fixes and preventive steps
- Replace ferrules and nuts if deformity is visible; brass ferrules often deform under over-tightening.
- When the pipe end is damaged, recut and deburr it; a clean end improves ferrule engagement.
- Prefer fittings at rough-in that permit serviceable swaps to protect a leak-resistant angle stop valve approach.
| Issue | Likely Cause | Quick Fix |
|---|---|---|
| Small weep at compression nut | Ferrule not seated correctly or ferrule damage | Loosen the nut, inspect and replace ferrule and nut, recut tube end, then retighten to spec |
| Leak at valve packing | Packed stem wear or bonnet misalignment | Shut water, tighten packing nut slightly, replace valve if packing is damaged |
| Valve stuck on buried nipple | Corroded or seized threads inside the wall | Cut back to an accessible fitting, then use a drop-eared 90 or sweat adapter at rough-in |
| Frequent leaks after solder | Weak solder joint or excessive flux residue | Desolder and thoroughly clean, resweat fittings correctly, or convert to a threaded elbow if serviceability is a priority |
Quality Standards, Certifications, And Product Examples
When selecting a valve, certifications and specific specs are key. NSF/ANSI 61 covers potable water safety, while ANSI/NSF 372 ensures lead-free compliance. ASME and CSA standards are also critical for projects that must meet regional codes. Product listings detail flow ratings and DN sizing, with DN 15 equivalent to a nominal 1/2 inch connection.
It’s essential to compare product features so they match project demands. Models with integrated seals do away with the need for extra tape or sealant. Some valves use built-in check valves and dual flow limiters to satisfy particular code or fixture requirements. The packing gland design and the supplied ferrules or nuts affect installation time and long-term leak resistance.
Schell’s DN 15 angle stop valve with integrated seal exemplifies how manufacturers present finish, dimensions, and certifications. Consumer ratings and Best Sellers rankings are valuable for assessing product reliability in plumbing fixtures. Established brands often offer combination valves with check valves or flow controls for particular applications.
Wholesale distributors make purchasing easier for contractors. Companies such as Installation Parts Supply source chrome compression angle stop valves from reputable manufacturers. They check both certifications and warranty coverage. It is important to compare wholesale versus retail pricing, check stock availability, and ensure certifications match project requirements before ordering in bulk.
When evaluating valve options, use a short comparison checklist:
- Certifications: NSF/ANSI 61, ANSI/NSI 372, plus ASME/CSA where applicable.
- Features: integrated seals, built-in check valves, flow limiters, packing gland design.
- Fitment: DN sizing, inlet/outlet types, included ferrules and nuts.
- Sourcing: wholesale availability, inventory levels, warranty coverage, and distributor reputation.
Keep records of certification numbers and batch information when you purchase. Such documentation supports code inspections and ongoing maintenance of plumbing fixtures. Retail listings and distributor catalogs typically include detailed spec sheets for each chrome compression angle stop valve, making it easier to match products to job requirements.
Valve Maintenance, Longevity, And Replacement Indicators
Ongoing maintenance is crucial for keeping valves in top shape and extending their service life. A simple inspection every six months can catch minor issues before they escalate. It’s smart to log any stiffness, small drips, or corrosion so you can track patterns.
Replacement Signs
Visible leaks around the compression nut or persistent dripping from the valve stem are clear signs that replacement is needed. Pitting or corrosion on the chrome finish weakens the metal and accelerates failure. If a 1/2 angle stop or 1/4 angle stop turns stiff or seizes, it clearly needs replacement.
Routine Maintenance Tips
Opening and closing valves a few turns on a regular basis helps prevent them from seizing. Cleaning aerators and supply lines regularly cuts down on sediment and mineral buildup. If you’re in a hard-water region, think about installing a point-of-use softener or sediment filter to slow the buildup that reduces valve life.
Caring For Compression Ferrules And Joints
Compression ferrules deform when tightened and should be replaced whenever a joint is disturbed. Using old ferrules again frequently results in leaks at the compression connection. For a dependable seal, always use new compression ferrules and nuts whenever you repair or replace the joint.
When To Upgrade Valve Types
Persistent leaks, repeated service calls, or complicated installations are good reasons to consider upgrading. Consider integrated-seal models, combination valves with built-in check valves, or switching from buried threaded nipples to sweat adapters for easier future service. Such upgrades can significantly improve longevity and reduce downtime for both homeowners and plumbers.
Lifecycle Expectations
Quality chrome-plated brass valves can last many years under normal conditions. The actual lifespan depends on water quality, usage frequency, and installation quality. Catching replacement signs early and doing routine maintenance helps a 1/2 angle stop or 1/4 angle stop perform better for longer, minimizing surprise failures.
Cost considerations and buying guide for homeowners and pros
Selecting the right valve involves weighing budget, scope of work, and long-term value. Homeowners and contractors need to weigh several factors. These include the base metal, quality of the chrome plating, and whether the part includes integrated seals or check valves. A higher-priced 1/2 x 1/2 angle stop valve built from solid brass with heavy chrome plating usually lasts longer than cheaper alloys in visible bathroom installations.
Retail purchases work well for small repairs where you only need a single valve. Pros, by contrast, frequently prefer distributors due to volume pricing and broader inventory selection. Installation Parts Supply provides a wider selection of certified models and contractor-friendly warranties. This can help lower overall job costs when buying multiple 1/2 compression angle stop units.
Budgeting should consider more than just the valve’s price. Include the cost of ferrules, compression nuts, possible adapter fittings, and basic tools for swap-outs. For bathroom hardware projects that are visible, match the finish and trim to the faucets to protect perceived value. For hidden valves, prioritize serviceability and reliability over cosmetic appeal.
When comparing retail and wholesale options, check warranty terms, return policies, and certification documentation. Wholesale channels can lower per-unit cost, but some retail lines offer lifetime warranties that offset the higher initial price. Consider the labor time saved through integrated features when estimating total project costs.
Use this quick checklist when selecting valves and related parts:
- Material and plating quality to ensure durability and finish match.
- Whether integrated seals or check valves are present to minimize added parts.
- How well the valve matches existing stub-outs or adapters to prevent rework.
- Supplier reputation and warranty strength, with special attention to distributors like Installation Parts Supply.
In summary, you should balance immediate price against long-term lifespan and serviceability. Putting a bit more budget into a quality 1/2 x 1/2 angle stop valve or sturdy 1/2 compression angle stop often cuts maintenance calls and enhances outcomes on home improvement jobs.
Conclusion
Choosing the correct chrome compression angle stop valve involves several key steps. First of all, confirm the sizes are appropriate for your system. Understanding how compression joints work is also essential. Finally, follow proven installation practices so the valve remains long-lasting and leak-resistant.
Whether you’re handling a DIY plumbing project or a professional installation, a few steps are critical. Make a habit of replacing ferrules during every service. For simpler installations, consider valves that feature integrated seals. Apply the right torque and sealing approach so the valve fits reliably.
Proper tools and close attention to detail are vital for a successful chrome valve installation. This approach minimizes the risk of leaks after installation. When purchasing valves, turn to trusted distributors such as Installation Parts Supply. They offer certified chrome-plated brass valves and integrated-seal models, including Schell DN15-style valves that meet potable water standards.
With the right parts, accurate measurements, and good craftsmanship, both homeowners and professionals can create durable, attractive, and long-lasting installations. This helps ensure many years of reliable service from your chrome compression angle stop valve.